

Home > News > How to Install Exhaust Tips on a Truck the Easy Way


How to Install Exhaust Tips on a Truck the Easy Way
Of all the bolt-on mods you can do to a diesel truck in a driveway, exhaust tips are the easiest by a wide margin. No jack stands. No draining fluids. No pulling sensors. You need a tape measure, a socket wrench, a rag, and 15 minutes per side. The only way to screw it up is to rush — and plenty of people do.
A 5-inch straight-piped diesel dumping through a bare, rust-freckled tailpipe looks unfinished. A 6- or 7-inch polished rolled-edge tip tucked just past the bumper? That’s a rear end that looks built, not bought. This guide covers everything from measuring your tailpipe correctly to clocking the clamp so it doesn’t look like a trip to AutoZone at midnight — with zero welding required.
What Exhaust Tips Actually Do (and Don’t Do) on a Diesel
Let’s clear up the sound question first, because it’s the one everyone asks and the one most guides get wrong.
Do Exhaust Tips Change Sound On A Diesel?
Marginally. Tips sit at the absolute end of the exhaust stream — after the downpipe, after the catalytic converter or delete pipe, after the muffler or resonator. By the time exhaust gas reaches the tip, everything that determines volume and tone has already happened upstream. (For a full breakdown of the acoustic science — how combustion pulses, system geometry, and tip design interact — read our deep dive: Do Exhaust Tips Change Sound? The Truth About Tone, Volume & Size.)
- A larger outlet diameter can give the note a slightly deeper, more open quality.
- A dual-wall tip with a resonated chamber can knock a few decibels off the rasp at the tail end of the RPM range.
- A turndown exit — where the tip angles toward the road — bounces sound waves off the pavement and into the cab, which makes the truck sound louder from the driver’s seat even if the actual decibel output hasn’t changed.
But if your truck has a stock exhaust system and you bolt on 7-inch tips expecting straight-pipe growl, you’re going to be disappointed. Tips are a cosmetic mod with a subtle acoustic side effect. If you want a real sound transformation, start with a cat-back or turbo-back exhaust system. Tips finish the look after the sound is already dialed in.
What Tips Do Well
They turn a bare, ugly tailpipe into a purposeful exit. On a diesel truck — where exhausts commonly run 4-inch, 5-inch, or even 6-inch piping and the tailpipe is visible from 50 feet away — the difference is immediate. A polished stainless rolled-edge tip tucked 1-2 inches past the bumper transforms the rear profile from “farm truck” to “built truck.”
Pick the Right Tip in 3 Measurements
Before you buy anything, grab a tape measure and walk to the back of your truck. Three numbers determine whether a tip fits or whether you’re spending the afternoon packing a return box.
Measurement 1: Tailpipe Outer Diameter — The One That Matters Most
This is non-negotiable. Measure the outer diameter (OD) of your tailpipe at the very end, where the tip will slide on. The easiest method: wrap a flexible tape measure around the pipe and divide the circumference by 3.14. Or use a digital caliper for a direct reading.
Common diesel truck tailpipe ODs:
- Stock Duramax / Powerstroke / Cummins: 3" to 3.5"
- 4" aftermarket exhaust: 4" OD
- 5" aftermarket exhaust: 5" OD
The tip’s inlet diameter must match your tailpipe OD — or be a hair larger so it slides over. A tip with a 4" inlet won’t clamp onto a 3.5" pipe, even if it technically slides on. A half-inch gap is a guarantee the tip will rattle, rotate, or launch itself into traffic on the first big bump.
Measurement 2: Outlet Diameter — The Look
This is the visible opening. On diesel trucks, outlet sizes range from 5" (subtle, factory-plus) to 8" (aggressive, pure show truck). The most popular combo: a 5" exhaust system with a 6" or 7" outlet tip.
The Limiting Factor Here Is Your Bumper Cutout
If the bumper has a molded exhaust exit, the tip’s outlet needs to clear it with at least half an inch of gap on all sides. Exhaust heat will discolor plastic and warp painted bumpers over time if the tip sits too close. If you can fit two fingers between the tip and the bumper, you’re good.
Measurement 3: Length — The Suitable
Measure from the end of your current tailpipe to the edge of your rear bumper (or the rearmost point of the body). Add 1 to 2 inches. That’s your ideal tip length. The tip should extend slightly past the body — enough to be visible from the side, not enough to be a shin hazard or look like a dryer vent on a bad day.
If your tailpipe already sticks out 2 inches past the bumper, you have two options: buy a short tip (8" to 12" overall length) or cut the tailpipe back. Cutting is covered below.
Clamp-On vs. Weld-On: Pick the Right Install for Your Truck
| Clamp-On | Weld-On | |
|---|---|---|
| Install time | 10-15 min per side | 30-60 min per side |
| Tools | Socket wrench, Allen key | MIG welder, grinder, PPE |
| Reversible | Yes — swap tips anytime | No — permanent |
| Theft risk | Low (realistically) | Zero |
| Can rattle | If not re-tightened at 50-100 miles | No |
| Best for | Daily drivers, seasonal swaps | Show trucks, off-road rigs |
For most diesel truck owners doing a driveway install, clamp-on is the right call. It’s faster, reversible, and if you re-tighten the set screw after 50 to 100 miles (heat cycling loosens everything), a clamp-on tip won’t rattle any more than a weld-on.
The theft concern gets overblown. A 7-inch polished tip clamped onto a 5-inch tailpipe sits inside the bumper cutout on most trucks. Someone would need a socket wrench and 60 seconds of uninterrupted access under your rear bumper.
The Solution:
Clamp the tip, check alignment, and if you’re worried about it walking away, tack the clamp nut. Not the tip itself — the clamp. One tack weld, two seconds with a MIG, and it’s not coming off without tools. Grind the tack off when you need to swap.
Step-by-Step: Clamp-On Exhaust Tip Installation
Step 1: Let the Truck Cool Down — Actually Cool Down
This is not the step you skip because you’re in a hurry. Diesel exhausts run hot. The tailpipe end might feel cool to a quick touch while the catalytic converter area is still 400°F. Give the truck 30 minutes minimum after shutting it off.
Step 2: Clean the Tailpipe
The last 3 to 4 inches of your tailpipe are coated in carbon soot, road grime, and possibly surface rust. A clamp-on tip needs clean, bare metal to grip. Wipe the pipe down with rubbing alcohol and a rag. For heavy carbon buildup, hit it with a wire brush first, then alcohol.
Step 3: Test Fit
Slide the tip onto the tailpipe without tightening anything. Check three things:
- Does the inlet slide on without forcing it? If it doesn’t fit, re-measure — you may have the wrong size.
- Is the tip straight? Step back 10 feet and look at the truck from directly behind. A crooked tip is visible from a block away.
- Does it extend the right distance past the bumper? 1 to 2 inches is the sweet spot.
If the tip fits but is slightly loose (a common issue when the tailpipe has rust pitting), some tips include shim sleeves. If yours doesn’t, a strip of aluminum HVAC tape wrapped once around the tailpipe adds just enough thickness to take up the slack without creating a rust sandwich.
Step 4: Secure the Clamp
Most clamp-on tips use either a set screw (a single bolt that digs into the pipe) or a band clamp (a metal strap that wraps around the inlet and tightens evenly). Band clamps are better — they distribute pressure around the full circumference instead of pinching at one point, which makes the tip harder to steal and less likely to rattle.
Tighten the clamp or set screw with a socket wrench — not an impact driver. You want it snug, not stripped.
The Rule:
Tighten until the tip won’t rotate by hand, then give it another quarter turn. If you’re using a set screw, alternate between screws if there are two or three, tightening each a little at a time so the tip stays centered.
Step 5: Clock the Clamp — The Detail Nobody Talks About
Every exhaust shop professional will tell you the same thing: clock your clamp. Position the clamp hardware — the nut, the threaded section, the saddle — so it’s not the lowest-hanging thing under the bumper and not the ugliest thing visible from behind the truck.
If the clamp body has a beefy saddle with extra metal at the 12 o’clock position (common on heavy-duty band clamps), clock it slightly past vertical — 11 o’clock or 1 o’clock — so the thickest part of the saddle clears the bumper trim without rubbing.
Step 6: Start the Truck and Check
Fire up the engine, let it idle for two minutes, then walk around back. Listen for any hissing or puffing at the tip-to-pipe junction — a leak there means the clamp isn’t fully seated. Try to rotate the tip by hand. If it moves, shut it off and tighten the clamp another quarter turn. Check that the tip hasn’t shifted from vibration. Check clearance to the bumper, the body, and any heat shields.
Step 7: Re-Tighten After 50-100 Miles
Heat cycling through the first few drives expands and contracts the metal at the clamp point, gradually loosening even a well-installed clamp. After your first tank of fuel with the new tips, crawl under and check the clamp. It’ll almost certainly need a quarter turn. After that, check at every oil change. It takes 30 seconds.
To Cut or Not to Cut: The Tailpipe Question
If your existing tailpipe extends more than 2 inches past the rear bumper, and you install a 15-inch tip on top of it, the tip will stick out far enough to look ridiculous. You have two clean options:
Option A:
Buy a shorter tip. Tips come in overall lengths from 8 inches up to 24 inches. If your tailpipe protrudes 2 inches and you want 1 inch of tip past the bumper, a 10- to 12-inch tip will work without cutting anything.
Option B:
Cut the tailpipe back. Mark the pipe where you want it to end — about half an inch inside the tip’s inlet so the tip itself does all the visible work — and cut it with a reciprocating saw or an exhaust pipe cutter. A dedicated exhaust pipe cutter (a chain-style cutter with cutting wheels) is cleaner and won’t leave burrs. Deburr the cut edge with a file before sliding the tip on.
The Tip Style Cheat Sheet
Diesel exhaust tips aren’t just different sizes — they’re different shapes, and each one reads differently on the back of a truck.
| Style | Look | Best On |
|---|---|---|
| Rolled edge, dual-wall | Thick, rounded outlet; tip body looks larger than it is | Almost everything. This is the default good choice. |
| Angle cut / slash cut | Diagonal opening; aggressive, race-inspired | Lifted trucks, off-road builds |
| Straight cut, single-wall | Clean cylinder; simple, understated | Stock-ish trucks, work rigs |
| Intercooled / turbine | Inner ring of fins inside the outlet; high-performance look | Show trucks, highly modified builds |
| Turndown / dump-out | Outlet angles toward the ground; louder in-cab sound | Trucks where you want more cabin noise without a muffler delete |
Rolled-edge dual-wall tips dominate the diesel scene for a reason: they look substantial. The double-wall construction means the outlet opening is framed by a thick, finished ring instead of a single sheet of 16-gauge steel. They clean up nicely and they don’t look like an afterthought.
Angle-cut tips look right on lifted trucks with aggressive wheel and tire setups — the diagonal cut mirrors the angular look of off-road bumpers and flares. Straight-cut singles work on stock or near-stock trucks where the goal is “clean” rather than “loud-looking.”
TruckTok Echo Chamber Tips: The Product Line
Not all exhaust tips are just chrome tubes. TruckTok’s Echo Chamber series uses a tapered expansion design — the tip body gradually widens from the inlet to the outlet, creating an acoustic chamber that deepens the exhaust note as gases expand through the tip. They’re clamp-on, stainless steel, and bolt on in under 10 minutes. Three sizes cover every diesel truck from a stock 3-inch pipe to a 4-inch aftermarket system on a lifted dually.
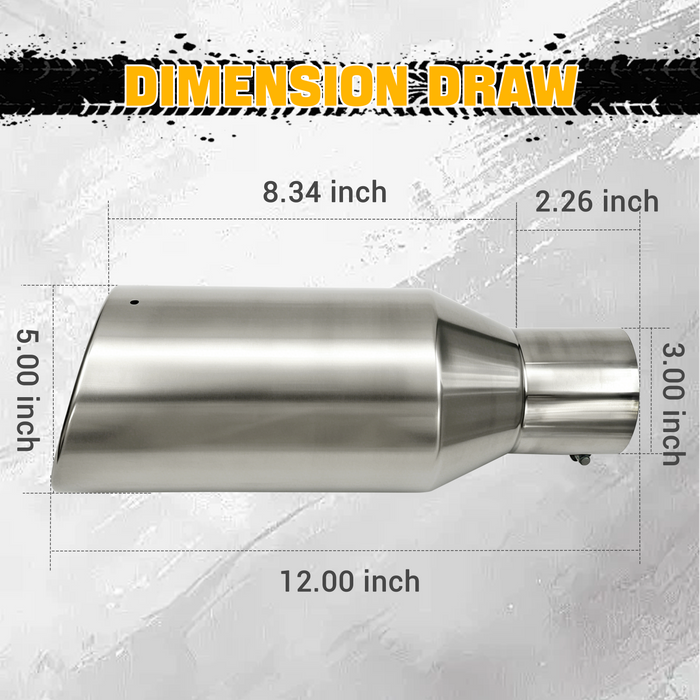
3" Inlet 5" Outlet 12" Overall Length Stainless Steel Bolt On Exhaust Tailpipe Tip
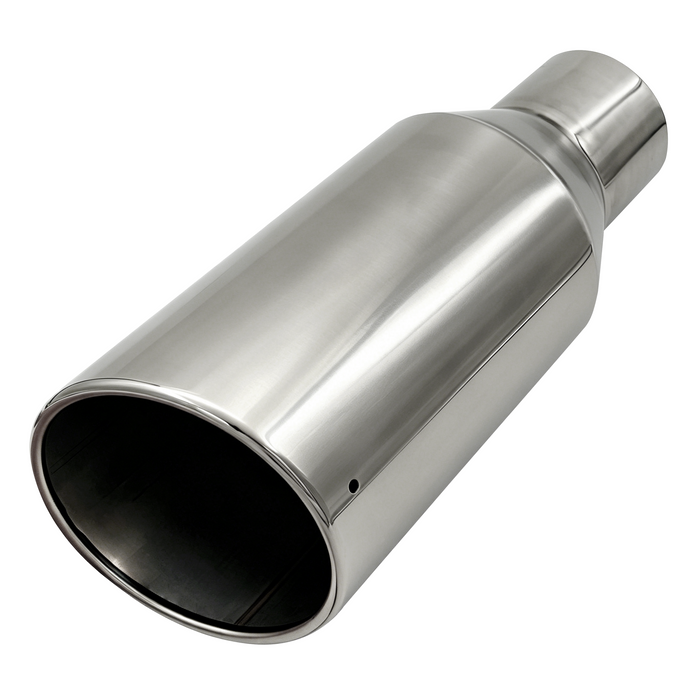
- The exhaust tips fits any truck with a 3-inch OD tailpipe — that’s most stock half-ton and older diesel trucks including 7.3L Powerstroke and 5.9L Cummins with factory exhaust.
- The tapered expansion from 3" to 5" acts as a natural megaphone, converting the high-pitched rasp of a stock diesel exhaust into a noticeably deeper, throatier rumble.
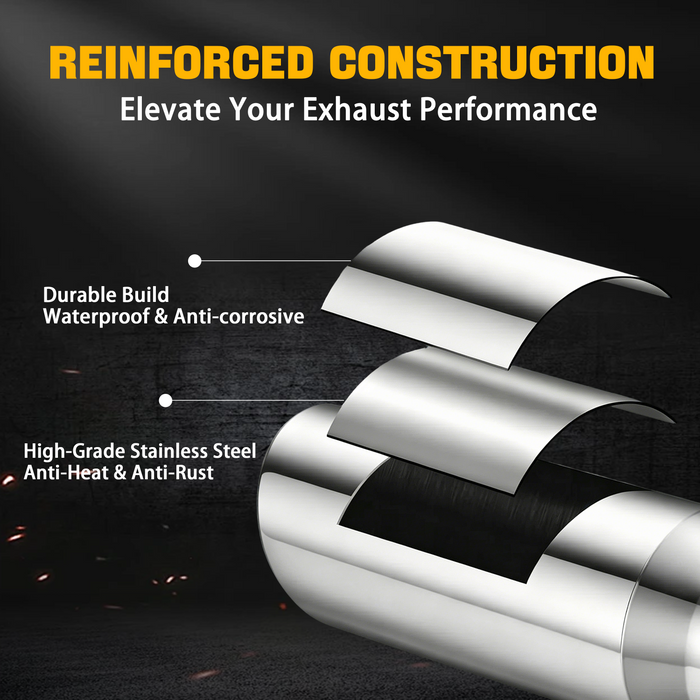
- Slant-cut rolled edge, polished 201 stainless steel, integrated weep hole to prevent internal rust.
- Bolt-on — slide it over the pipe, tighten the clamp, done in 5 minutes. Also weldable for a permanent install. The specific installation steps can be found in the fourm.
4" Inlet 6" Outlet 15" Overall Length Stainless Steel Bolt On Exhaust Tailpipe Tip
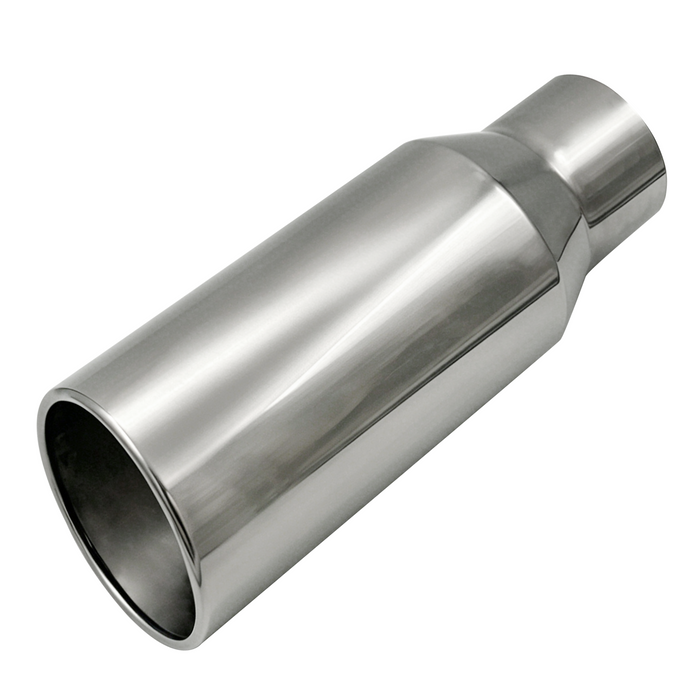
- For trucks running a 4-inch aftermarket exhaust — Duramax, Powerstroke, or Cummins.
- The extra 15-inch length exhaust tips is what sets this apart from standard 12-inch tips: it completely hiding the ugly 4-inch pipe transition, while extending cleanly past wide fender flares or aftermarket mud flaps on lifted trucks.
- The longer tapered body acts as a bigger echo chamber — slightly deeper, more hollow rumble than the 12-inch version.
- 6-inch rolled-edge outlet clears most stock bumpers with room to spare.
- Chop a few inches off your tailpipe before installing for the cleanest, flush-to-bedside look.
4" Inlet 10" Outlet 18" Overall Length Bolt On Exhaust Tailpipe Tip Black
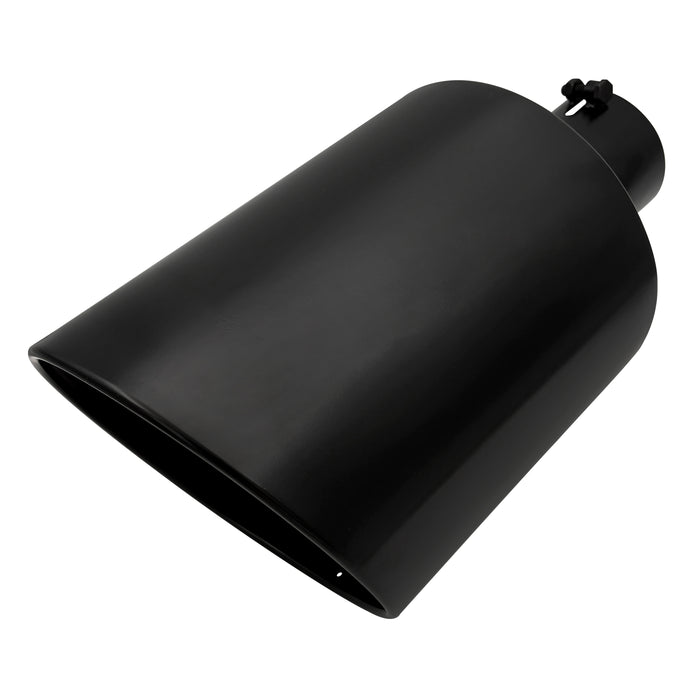
- A 10-inch outlet on an 18-inch body — this is for heavily lifted trucks, duallys, and wide-body builds where a standard 6-inch tip disappears into the bumper cutout.
- The matte black high-temp coating serves two purposes: it looks aggressive against any paint color, and it hides diesel soot instead of highlighting it the way polished stainless does.
- On tuned trucks that roll coal, shorter tips let soot curl back onto the quarter panel — the 18-inch length pushes the exhaust exit further from the body.
- The massive expansion chamber delivers the deepest, most resonant tone of the Echo Chamber lineup.
- Due to its size and weight, make sure your rubber exhaust hangers are solid — worn hangers will let this tip bounce against the frame.
- Not for stock bumpers — needs a lifted truck, side-exit setup, or aftermarket high-clearance bumper.
Common Mistakes That Make a 15-Minute Job Take an Hour
-
Working on a hot exhaust. You’ll burn yourself, the pipe will be expanded so the tip won’t slide on easily, and once it cools, the clamp will be loose. Wait 30 minutes.
-
Ordering the wrong inlet size. “It looks about right” is how you end up with a 3-inch inlet on a 4-inch tailpipe. Measure your tailpipe OD with a tape measure, not your eyeballs.
-
Over-tightening the set screw. Cranking it with a breaker bar dents the tailpipe, strips the threads, or cracks the clamp body. Snug, then a quarter turn. That’s it.
-
Zero bumper clearance. A tip outlet that’s pressed against a plastic bumper will melt or discolor the bumper over time. Half an inch minimum gap in every direction.
-
Skipping the re-tighten. Heat cycling loosens everything. Check the clamp after 50-100 miles. The tip that was rock-solid in your driveway might be finger-tight after three heat cycles on the highway.
-
Welding under the truck without dropping the exhaust. The top third of the pipe is too tight to the body to properly prep and weld. If you’re welding tips on, tack them in place on the truck, drop the exhaust, weld the full circumference on a bench or the ground, and re-hang it.
Conclusion
Exhaust tips are the easiest cosmetic mod on a diesel truck — 15 minutes per side with basic tools, zero risk of mechanical damage, fully reversible. The work isn’t complicated. The difference between an install that looks right and one that looks rushed is the details: measuring the tailpipe OD before ordering, clocking the clamp so the hardware isn’t the first thing someone sees, and checking the set screw again after the first tank of fuel.
Walk out to your truck. Measure the tailpipe. Then head to TruckTok — we stock three sizes that cover every diesel from a stock 7.3L to a tuned L5P on 4-inch pipe to a lifted dually. All exhaust tips are bolt-on, polished stainless or high-temp coated, and ship free. Slide it on, tighten until it won’t rotate, clock the clamp to 10 o’clock, and drive. Re-tighten after 100 miles — you’ll be done before your next oil change is due.
Frequently Asked Questions
Q1: Do I need to weld exhaust tips?
A1: No. Most aftermarket exhaust tips use clamp-on or bolt-on designs that slide over the tailpipe and secure with set screws or a band clamp. Clamp-on is the standard for DIY driveway installs. Weld-on exists for permanent, theft-proof applications, but it requires welding equipment and skill.
Q2: How long does it take to install exhaust tips?
A2: 10 to 15 minutes per side for a clamp-on install, assuming you have the right size tip and basic hand tools. Most of that time is letting the tailpipe cool down and cleaning it. The actual slide-on-and-tighten step is 60 seconds.
Q3: Will a larger exhaust tip make my diesel louder?
A3: Not in any meaningful way. A larger outlet diameter slightly deepens the exhaust note at idle and low RPM, but the difference is subtle. A turndown tip bounces sound off the pavement and makes the truck sound louder from inside the cab. For a real volume increase, you need a muffler delete, a resonator delete, or a full exhaust system upgrade — the tip alone won’t do it.
Q4: What’s the most common diesel truck exhaust tip size?
A4: A 6-inch or 7-inch outlet tip on a 5-inch exhaust system is the most popular combination. Stock tailpipes are typically 3" to 3.5", and owners running stock exhaust commonly use 4" to 5" outlet tips.
Q5: Should I cut my tailpipe before installing a tip?
A5: Only if your tailpipe already extends more than 2 inches past the bumper. Measure from the bumper to the end of the tailpipe. If it’s sticking out far enough that adding a tip would look absurd, cut it back so the tailpipe ends about half an inch inside the tip’s inlet. Use a reciprocating saw or exhaust pipe cutter, and deburr the cut edge.
Q6: How do I keep a clamp-on tip from rattling or falling off?
A6: Clean the tailpipe surface before installation. Tighten the clamp evenly until the tip won’t rotate by hand, plus a quarter turn. After 50 to 100 miles of driving, re-tighten — heat cycling loosens the clamp. Check again at every oil change. A band clamp holds better than a single set screw. If the pipe has surface rust or pitting, a wrap of aluminum HVAC tape fills the gap and prevents the tip from vibrating.
Q7: Which finish holds up best on a diesel — chrome, polished stainless, or matte black?
A7: Polished stainless. It resists corrosion, doesn’t pit from diesel soot the way chrome does, and cleans up with metal polish and a microfiber cloth. Chrome looks good when new but pits and peels over time, especially near the coast or in winter-salt states. Matte black powder coat or ceramic finish looks aggressive but requires careful cleaning — metal polish strips the coating, so you’re limited to soap and water.
Q8: Can I install exhaust tips if I have dual exhaust?
A8: Yes. You’ll need two tips — one for each exit. The process is identical per side. Pay extra attention to making both tips sit at the same depth past the bumper. A quarter-inch difference is visible from behind. Measure and mark both tailpipes at the same insertion depth.
Q9: How do I clean diesel soot off exhaust tips?
A9: Diesel soot is carbon-heavy and sticks harder than gasoline soot. Start with soap and water. If that doesn’t cut it, use a dedicated metal polish (Mother’s or similar) with a microfiber cloth. For baked-on buildup, 0000-grade steel wool with metal polish works without scratching the finish. Clean the tips when they’re cold. Don’t use abrasive pads on chrome or polished stainless — they leave visible swirl marks.
Q10: What’s the difference between single-wall and dual-wall tips?
A10: A single-wall tip is one layer of tubing from inlet to outlet. The outlet edge is a single thickness of metal — it looks thin and unfinished up close. A dual-wall tip has two concentric layers. The outer layer forms the visible body, and the inner layer is a smaller-diameter tube that carries the exhaust. The outlet opening is framed by a thicker, rolled-edge ring that looks substantially more finished.