Home > News > 2011-2023 6.7L Powerstroke CCV Problems — Symptoms, Diagnosis, and Fix

2011-2023 6.7L Powerstroke CCV Problems — Symptoms, Diagnosis, and Fix
The crankcase ventilation (CCV) system on a 6.7L Powerstroke is the single most overlooked maintenance item on the engine — and the one that quietly causes more oil leaks than any other single part. But here’s the thing most forum threads get wrong: a CCV problem is rarely the CCV’s fault.
That little black box sitting on the driver’s side valve cover, next to the fuel filter, is doing its job until two very different things can go wrong. Either its internal media finally plugs up (a cheap, predictable fix), or the engine itself is producing so much blow-by that no separator in the world can keep up (an expensive engine problem). Telling those two apart — before you spend money — is what this guide is actually about.
What the CCV System Does: Why Diesels Need It More Than Gas Engines
Every engine has blow-by. During combustion, a small amount of gas slips past the piston rings and into the crankcase. That gas is a cocktail of unburned fuel, oil vapor, and moisture — and it has to go somewhere, or crankcase pressure climbs until it finds the weakest seal and pushes oil out through it.
Blow-By Is a Pressure Problem, Not a Mess Problem
The crankcase is a sealed chamber. Pump gas in and give it nowhere to go, and the pressure has to escape through the path of least resistance. That path is almost always a seal:
- Front main seal and rear main seal
- Valve cover gaskets
- Upper and lower oil pan gaskets
The 6.7L is especially notorious for upper oil pan seepage, and a plugged CCV is the hidden cause in a large share of those cases. The truck drips oil at the bell-housing-to-engine seam, and nine times out of ten it’s not the pan gasket that failed — it’s the crankcase being over-pressurized by a restricted separator.
The Separator’s Job: Oil Back, Gases Forward
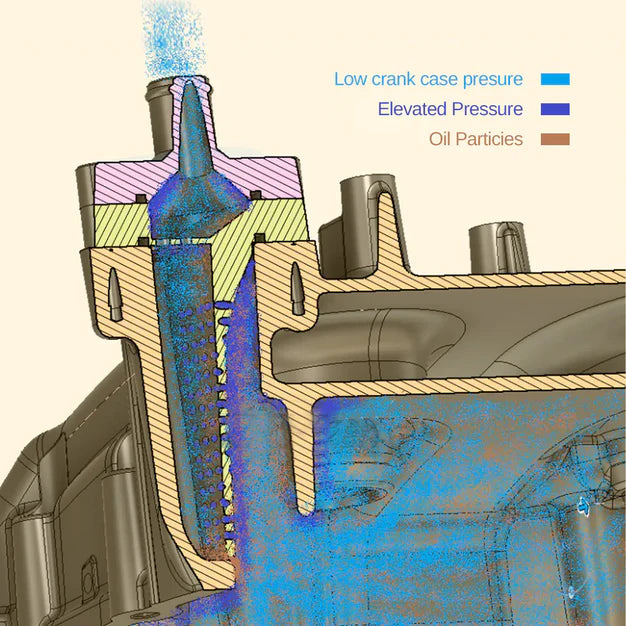
On a factory 6.7L, blow-by exits through the driver’s side valve cover into a plastic box. Inside, a series of baffles (or, on the earliest trucks, a centrifugal “swirl chamber”) separates the oil mist from the gas. The oil drains back to the crankcase through a small port; the cleaned gases are routed back in front of the turbo and burned in the cylinders.
That closed loop is what keeps the truck emissions-legal — and it’s why the whole thing is more fragile than it looks. The separator media gradually loads up with oil and soot, and once it restricts, the pressure it was designed to relieve has nowhere to go but out through your gaskets.
The 6.7L’s Generation Problem: Four Oil Separators, One Bad One
Here’s the trap that catches most owners: “the 6.7L CCV” is not one part. Ford ran four different oil-separator designs across the 2011–2023 run, and they are not interchangeable in behavior, even when they bolt up.
An independent back-to-back test measured crankcase pressure (in inches of water, where 1 PSI ≈ 28 inches) at full throttle on a 2012 truck, swapping through the designs. The results explain exactly why Ford kept redesigning the thing:
| Separator generation | Internal design | WOT crankcase pressure | Verdict |
|---|---|---|---|
| 2011–2016 (first-gen) | Centrifugal swirl chambers + CDR valve | ~40 in. H₂O | Off the charts — the reason it was redesigned |
| 2017–2022 (bolt-on lid) | Basic baffles + tiny 1×1" non-serviceable filter, no CDR | ~10.4 in. H₂O | Better, but a small filter that will clog over time |
| 2023+ (compact) | Spring-loaded entry filter + CDR valve returns | ~3.2 in. H₂O | Best OEM unit by a wide margin |
| TSB replacement (DRW/cab-chassis) | No serviceable element | — | Issued to replace the plug-prone element box |
The First-Gen Is the One You Want Off Your Truck
The 2011–2016 separator used a clever centrifugal design — gas swirls through six angled chambers and oil is flung to the walls — but it restricted flow badly under load. Forty inches of water is enough to blow the oil fill cap clean off the tube (the same test measured it launching roughly three feet). If you own a 2011–2016 and haven’t touched the CCV, this is your single biggest source of hidden oil leaks.
The TSB That Confirms the Pattern
Ford issued a Technical Service Bulletin for 2016–2019 F-650/F-750 and 2017–2019 dual-rear-wheel/chassis-cab trucks: extended idling can plug the filter element, drive up crankcase pressure, and cause oil consumption and leaks. The fix was a revised separator with no serviceable filter element at all — Ford’s quiet admission that a pluggable media inside a crankcase vent is a liability.
The takeaway: don’t buy a CCV part by year alone. Confirm which separator your truck actually has — by looking at it.”
Symptoms: What a Failing CCV Actually Looks Like
The symptoms below all point at the CCV system, but — as you’ll see in the next section — they split into “cheap filter fix” and “expensive engine problem.” Here’s what to look for:
Oily Film Around Intake Boots and Charge Pipes
A light film is normal — the closed loop routes oil vapor through the intake by design. But heavy pooling or a wet, greasy residue around the intercooler boots and charge pipes means the separator is no longer separating, and liquid oil is being carried into the intake tract. On trucks with the earliest design, the compressor inlet itself can be visibly coated.
Oil Seepage at the Bell Housing or Oil Pan
The classic 6.7L complaint. Crawl underneath and look where the transmission bell housing meets the engine, or at the upper oil pan seam. If the truck is around 100,000 miles and the seepage is fresh, a restricted CCV is the most likely root cause — before you blame the pan gasket itself.
A Swollen Separator Box
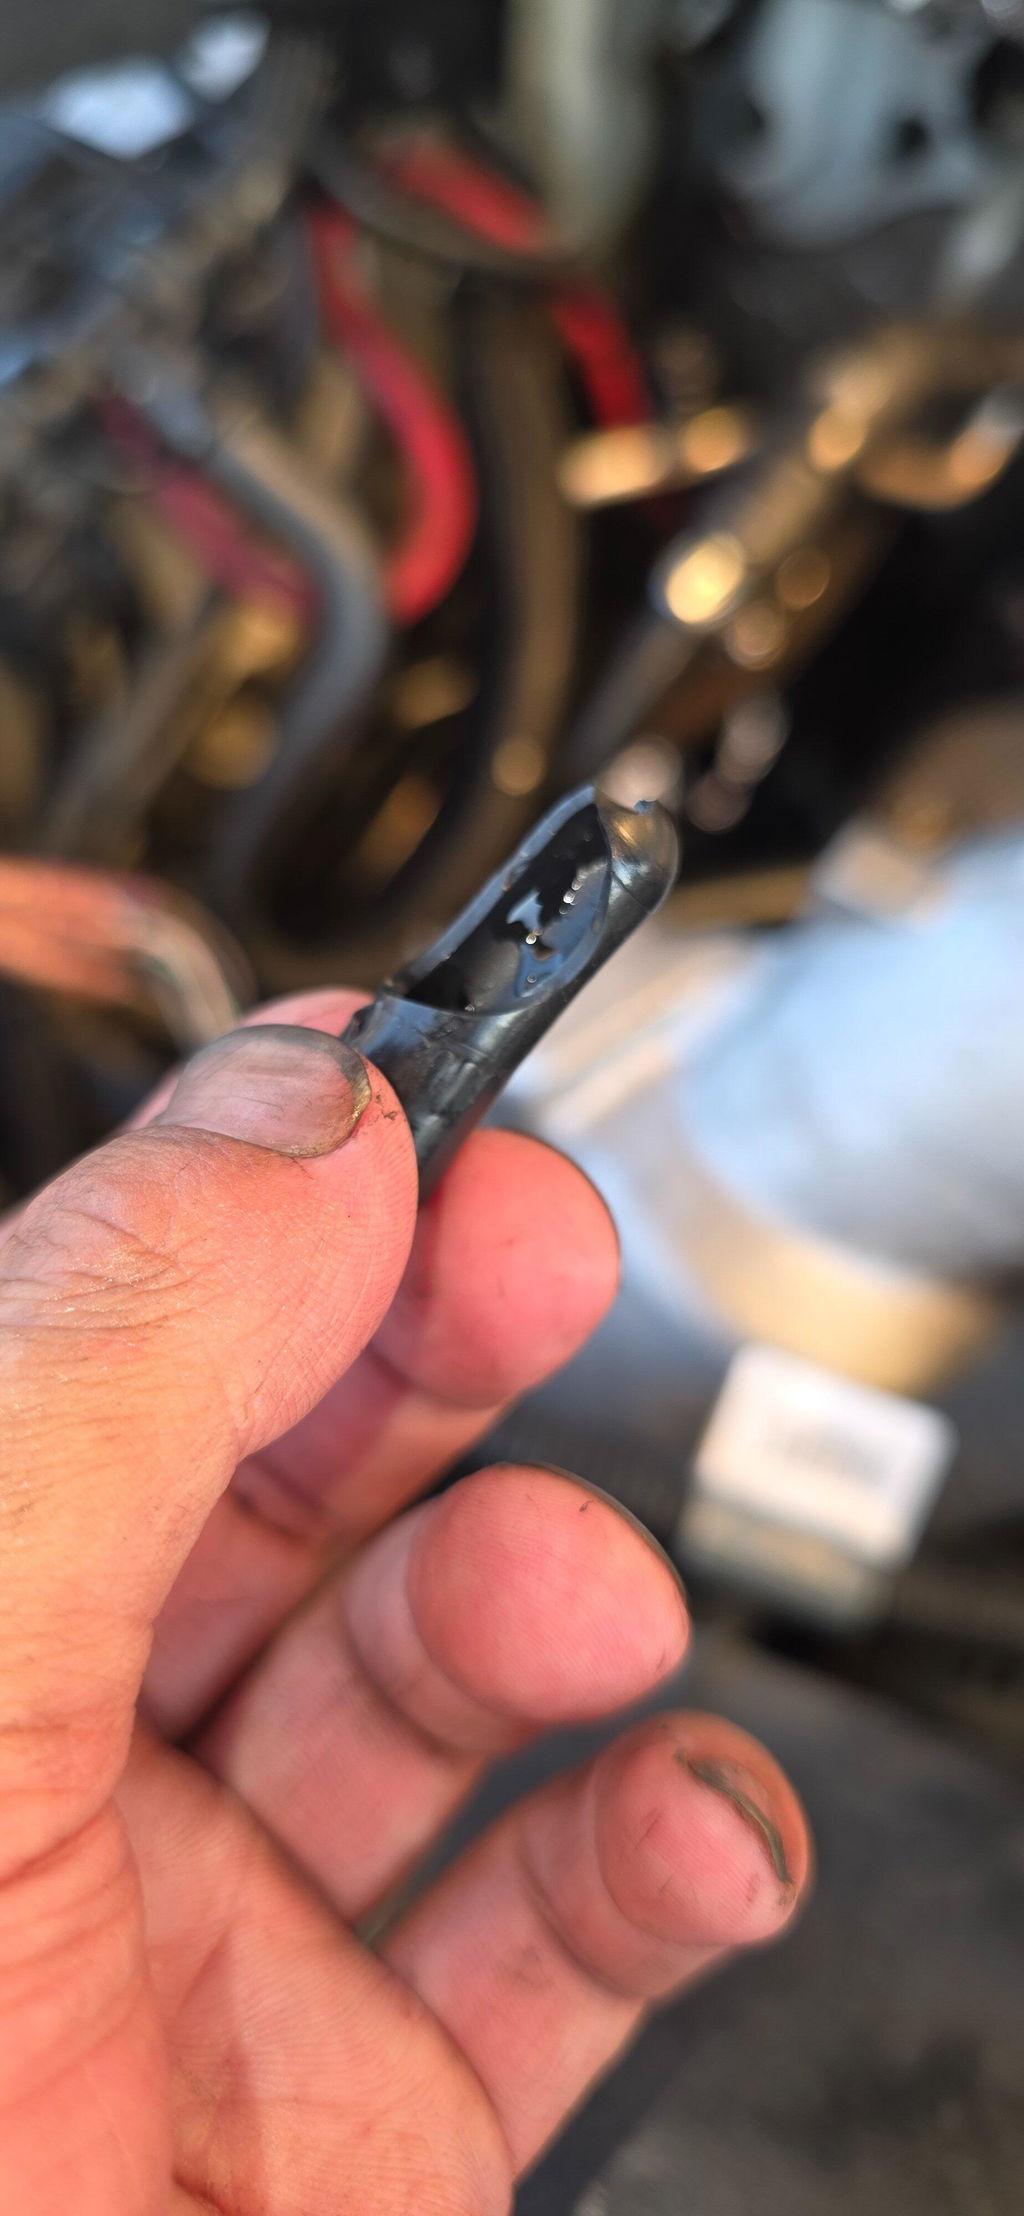
This is the tell the video installers always mention: a plugged separator physically expands. The plastic box swells as internal pressure builds. If your CCV box looks bulged or distorted compared to a new one, it’s done.
Rising Oil Consumption
When the separator stops catching oil mist, that oil is drawn into the intake and burned. You won’t always see blue smoke on a modern diesel — the DPF masks it — but you’ll notice the level dropping between changes.
A Dancing Oil Fill Cap
At idle, pull the oil fill cap and rest it loose on the tube. If it rattles, dances, or gets pushed off, you have positive crankcase pressure. (The subtle version — a light puff of air — is normal and harmless; the cap visibly lifting is not.)
The Codes: P04DB / P04E2 / P04E3
These are the crankcase-ventilation-specific OBD-II codes:
- P04DB — crankcase ventilation system disconnected. This is a circuit/sensor code, not a “filter is clogged” code. It typically appears after a reroute on the early trucks.
- P04E2 / P04E3 — crankcase ventilation hose-connection sensor circuit low / high.
The catch: 2011–2014 trucks have an electrical connector on the ventilation hose that later years removed. So the early trucks can throw a P04DB after a delete (the sensor no longer sees a connected hose), while 2015+ trucks generally won’t.
Diagnosis: Filter vs Engine — The Split That Decides Everything
This is the whole point of the article. Every symptom above has two possible causes, and they cost wildly different amounts to fix. Here’s how to tell them apart without throwing parts at it.
The Two Root Causes
Cause 1 — a plugged separator (the cheap one). The media loads up over ~100,000 miles, restricts flow, and drives crankcase pressure up against the seals. Fix: replace the filter box (~$75–$120) or convert to a reroute. Symptoms clear and stay clear.
Cause 2 — excessive blow-by (the expensive one). The piston rings are worn, a turbo seal is leaking, or a fuel injector’s copper crush washer isn’t sealing — and the crankcase is being flooded with combustion gas faster than any separator can vent it. No CCV fix touches this. The fix is mechanical: rings, turbo, or injector work.
How to Tell Them Apart
1. The pressure test (the definitive one). A digital manometer reads crankcase pressure in inches of water — the only tool sensitive enough for this. A healthy 6.7L at idle sits near 1–2 inches of water. Under a full-throttle pull, a good setup stays in the single digits to low teens.
The working limit: around 2 PSI (~56 inches of water) is the ceiling. Below that, the separator is doing its job. Above it — or if you’re seeing the first-gen’s signature 40 inches at WOT — the restriction (or the blow-by) is real.
2. The oil-cap test. Loose cap rattles = pressure. But remember: a light puff at idle is normal; the cap launching is the 40-inch first-gen signature, not a subtle warning.
3. The “did a new filter fix it?” test. If you replace a plugged separator and the leaks and consumption clear up, it was Cause 1. If you replace it and the symptoms come right back within a few thousand miles, you’re looking at Cause 2 — and the CCV was never the real problem.
4. The catch-can truth test. Install a catch can, drive 5,000 miles. If it fills up fast, that’s not “the can working great” — that’s diagnostic information: your engine is producing more blow-by than it should, and the can is just exposing it.
The Three Fixes
Once you’ve diagnosed which cause you’re dealing with, here are your three paths — and what each one actually does.
Option 1 — OEM Filter Replacement (The Legal, Low-Risk Path)
Replace the factory separator with the correct generation unit. This keeps the closed loop, stays emissions-compliant, and preserves warranty and resale value. It’s the right call for a street-driven, inspected, or warrantied truck.
- Cost: ~$75–$120 for the part.
- Interval: roughly 100,000 miles (earlier if you idle a lot, tow hard, or run in dust).
- What it fixes: Cause 1 only. A restricted separator.
Option 2 — Reroute With a Catch Can (The “Clean Intake” Middle Ground)
Redirect crankcase gases through an external catch can / oil separator before returning them (or venting them). This keeps oil mist out of the turbo inlet and intercooler, at the cost of a can you have to drain and hoses you have to route and inspect.
- Cost: ~$150–$400 for the kit, plus ~$95–$400 for a quality can.
- What it fixes: intake cleanliness. It reduces oil vapor reaching the turbo — but it does not fix a worn engine, and it adds a maintenance item (drain the can, watch for freeze-up in cold weather).
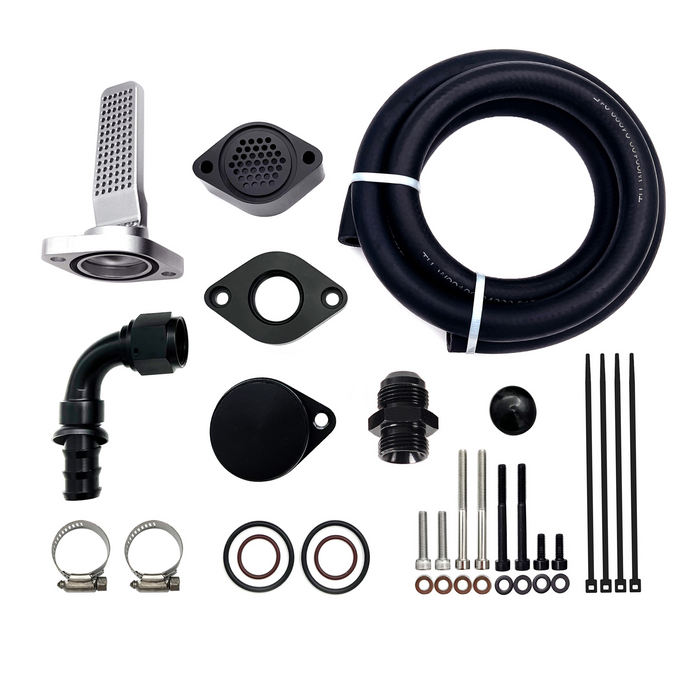
2011-2023 6.7L Ford Powerstroke CCV PCV Reroute Engine Ventilation Kit (ER-0179)
The 6.7 Powerstroke CCV Reoute is a premium build. A fully CNC-machined billet-alloy block with a black-anodized finish and an internal Venturi throat that accelerates exiting gases to generate a consistent vacuum pull. It ships with heavy-walled, petroleum-grade reinforced hose.
- Billet construction built for long-term engine-bay heat.
- Venturi throat for active pressure evacuation, not just passive venting.
- Designed to pair with a catch can if you want the intake-cleanliness benefit without venting raw oil mist straight to the frame.
- We provide detailed installation instructions
Option 3 — Full Vent-to-Atmosphere Delete (The Permanent, Off-Road Path)
Remove the separator entirely and vent blow-by directly to atmosphere (or into the frame rail). No filter to plug, ever, and maximum pressure relief. But it’s not legal for street use, it smells, and it leaves an oily residue wherever the hose points.
- Cost: ~$150–$300 for a kit.
- What it fixes: Cause 1 permanently — there’s no media left to clog. It still does nothing for Cause 2.
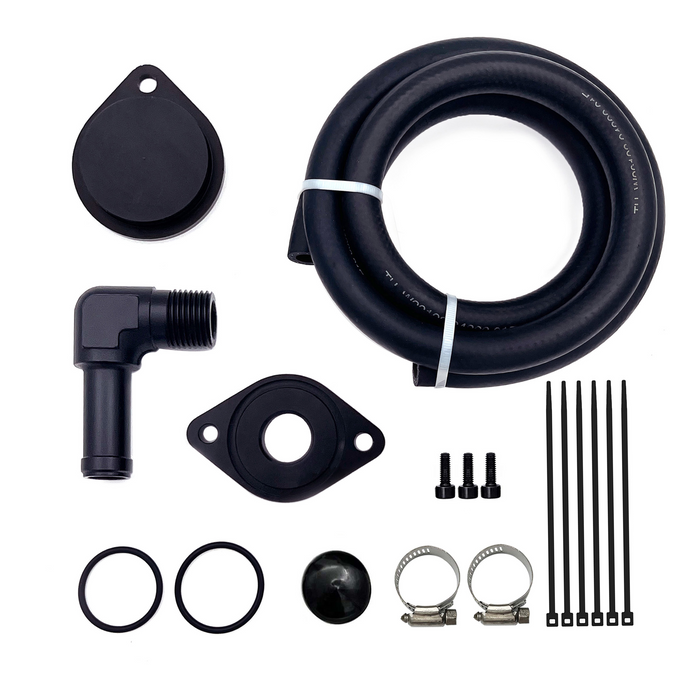
2011-2023 6.7L Ford Powerstroke CCV/PCV Reroute/Delete Engine Ventilation Kit (ER-0091)
The 6.7L Ford CCV/PCV delete kit is a value option. A CNC anodized Venturi-style adapter block replaces the restrictive factory baffles with a smooth, straight-through evacuation path, and it ships with 6 feet of reinforced 3/4" silicone hose rated for hot oil vapor — no rubber hose that absorbs oil and softens.
- Straight bore, no baffles — nothing left to clog.
- Service-free for life — no more filter replacements.
- Fits the full 2011–2023 run, sealing on both the early metal and late composite valve covers.
- No electronics on the CCV loop, so no check-engine light from the install.
- We provide detailed installation instructions
Which one? If you want the simplest permanent fix at the lowest cost, the ER-0091 does the job. If you want the stronger billet build, the active Venturi pull, and the option to trap oil in a catch can rather than drip it under the truck, step up to the ER-0179. Either way, the vent path stays short, straight, and uncrimped — the rule from the section above.
The Honest Answer: What a Reroute Actually Changes
A lot of CCV marketing implies you’re buying horsepower or fuel economy. You’re not. Here’s the honest accounting:
- No horsepower gain. The CCV is a vent, not a power component. Removing it changes nothing at the crank.
- No fuel-economy gain. The truck doesn’t burn less diesel because the crankcase vents better.
- What you do get: a cleaner turbo inlet and intercooler over time, fewer oil leaks driven by a plugged stock separator, and (with a delete) the elimination of a maintenance part.
That’s it. It’s a reliability and cleanliness upgrade, not a power mod — and every reputable source agrees on this. If you’re doing it for the intake cleanliness and the leak prevention, you’re doing it for the right reasons.
The Reroute Trap: When “More Plumbing” Makes It Worse
Here’s the counterintuitive warning that most install guides skip: a badly routed reroute can raise crankcase pressure higher than the stock box it replaced.
The Test That Exposed It:
A truck came in with over 13 inches of water of crankcase pressure — more than a stock separator would allow. The cause wasn’t the engine. It was the plumbing. The owner had run a long hose through multiple fittings, an extra catch can, and a Venturi fitting in the exhaust, all chained together. Disconnect the hose from the valve cover and the pressure dropped to 1.2 inches instantly.
Where the Restriction Hides
- 45° AN fittings with an inside diameter far smaller than the 3/4" hose they join.
- A Venturi with a small orifice, caked with crud over time.
- Fifteen feet of hose with a dozen bends and another can in the middle.
Every fitting, bend, and length of hose adds restriction. Stack enough of them and you’ve recreated the plugged-filter problem you were trying to escape — only now it’s your own install doing it.
The Two Non-Negotiables
- Keep the vent path short and straight. Big-diameter hose, minimal fittings, no redundant cans in series.
- Never crimp or pinch the hose. A kinked vent hose backs crankcase pressure up into the turbo’s oil drain — oil can’t drain, pressure pushes past the turbo seals, and the truck starts huffing oil out the exhaust.
What No CCV Fix Can Repair
Before you order anything, be clear-eyed about the ceiling of this whole category. A CCV fix — whether it’s a new filter, a reroute, or a delete — cannot fix:
- Worn piston rings (excessive blow-by is mechanical, not a venting issue)
- A leaking turbo oil seal (that oil in the intake isn’t coming from the CCV)
- A failed injector copper crush washer (a classic source of crankcase pressure on common-rail diesels)
- The CP4 fuel pump (a completely separate 6.7L weakness — nothing to do with crankcase ventilation)
If your pressure test says the crankcase is being over-pressurized by the engine, fix the engine. No amount of catch cans or delete kits will vent your way out of worn rings.
Installation: Step by Step
A CCV reroute is a roughly 1-hour DIY job with basic hand tools, and the process is essentially the same across all 2011–2023 model years. Here’s the full walkthrough, drawn from a real 2012 F-350 install, with the tool sizes and the awkward spots called out so you don’t hit them blind.
Tools You’ll Need
- 8mm and 10mm sockets, plus a 10mm extension
- 5mm Allen key (drives the adapter and block-off bolts)
- Flathead screwdriver
- Ratchet, and a magnetic tray — the small bolts love to vanish into the engine valley
- Carb or brake cleaner and a clean rag (for the mating surfaces)
- Zip ties (optional, for tidying the hose)
Step 0 — Locate the Box
Driver’s side, against the firewall, next to the fuel filter. On the hot side you’ll see the intercooler pipe, then the fuel filter, then the CCV box behind it. Underneath the box are two ports:
- The rear port is the vent (where gases exit, against the firewall)
- The front port is the oil drain (where separated oil returns to the crankcase).
A plastic hose runs from the box forward and connects to the turbo inlet tube.
Step 1 — Clear the Fuel Line (The One Awkward Bolt)
There’s exactly one bolt on this job that fights back, and it hides under the hard fuel line where it transitions from hard to soft line:
-
Find the hard fuel line that bolts to the engine right next to the CCV box.
-
Remove that single retaining bolt and pry the hard line up just a hair — just enough to clear the bolt underneath it.
-
Slip a 10mm socket on an extension down underneath the line and get it onto the hidden bolt. You can use the socket itself to pry the line up a touch more, but go easy — you only need clearance to seat the socket, not to bend the line.
That’s the only genuinely hard part. Everything else is straightforward.
Step 2 — Remove the Box
-
Release the intake tube. The plastic collar on the hose in front of the turbo is a lefty-loosey locking collar — turn it counterclockwise to free the locking tabs, then pull the hose straight off the intake tube. (Some of these come off easily; if it’s stubborn, work the collar a little before you pull.)
-
Pull the fuel filter housing. It’s optional, but it makes the box drop out clean. It’s held by a couple of 8mm bolts — a 13mm on the front side if it’s been a while — and once it’s out of the way the separator comes out free and clear.
-
Unbolt and lift out the separator. A couple of 8mm bolts hold it. The rear adapter and the oil-drain plug will go where its two ports were.
Step 3 — Install the Adapter and Block-Off
-
Wipe the ports clean first. A little oil will have seeped out of the drain port when you pulled the box — wipe it off before you spray anything, so you don’t contaminate the oil. Then hit the mating surfaces with carb cleaner and a rag.
-
Mount the vent adapter to the rear port. The adapter seats on an O-ring that sits on top of the flange — it doesn’t go inside it. Drive the bolts with the 5mm Allen.
-
Seat the O-ring evenly. This is the detail that prevents leaks: tighten the bolts back-and-forth — rear, front, rear, front — so the O-ring compresses flat onto the face. If you crank one side down first, the adapter cocks and pinches the outer rim of the O-ring, and you’ll chase a leak later.
-
Install the oil-drain block-off plug on the front port — it just pushes down into the hole and bolts in.
-
Cap the turbo inlet port where the old hose connected. A zip tie on the cap is optional insurance; the cap seats on its own.
Step 4 — Route the Hose
-
Run the 3/4" hose from the rear adapter, up and over the brake booster, then down.
-
Tuck the end into the frame rail — not straight down where a drive-through window or a passenger at the curb will catch the blow-by smell. Routing into the frame keeps the vapor off you and anyone behind you.
-
Keep the run short and straight, avoid sharp bends, and — most important — do not crimp or kink the hose. A pinched vent backs crankcase pressure up into the turbo’s oil drain, and the truck starts huffing oil out the exhaust.
Step 5 — Reassemble and Prime
-
Bolt the fuel filter housing back in and reconnect all the lines.
-
Prime the fuel system — because you opened the fuel lines when you pulled the housing, cycle the key to the run position a few times (without cranking) to let the lift pump refill the lines before you start it.
-
Start the truck and check for anything weeping out of the rear adapter or the drain plug — with the O-ring seated evenly, it should be dry.
Where Installers Get It Wrong
- Crimping the hose — backs pressure into the turbo drain and pushes oil past the turbo seals. The #1 mistake on this job.
- Uneven O-ring seating — tightening one side down first pinches the seal and leaks. Go rear-front-rear-front.
- Too much plumbing — long hose, multiple fittings, and a redundant catch can all add restriction and can recreate the over-pressure problem you removed.
- Using cheap hose — thin rubber absorbs oil, softens, and collapses. Silicone or oil-rated hose only.
- Forgetting to prime — after opening the fuel lines, skip the key-cycle and the truck cranks dry and stalls.
The Legal Reality
Venting crankcase gases to atmosphere removes part of the truck’s certified emissions control, and on a street-driven, registered vehicle that runs afoul of the federal Clean Air Act (42 U.S.C. § 7522). Fines for individuals can reach into the thousands, warranty coverage can be voided, and a deleted truck may fail a state inspection or be refused as a trade-in.
The honest framing: an OEM filter replacement is legal everywhere. A reroute with a sealed catch can that returns cleaned gases to the intake is the middle path most owners can defend. A full vent-to-atmosphere delete is an off-road, competition, or non-road modification — know your local and state rules before you commit.
Conclusion
The 6.7L Powerstroke’s CCV system fails in two completely different ways, and the fix depends on which one you’re actually dealing with.
- A plugged separator is a cheap, predictable 100,000-mile maintenance item — replace it or convert to a reroute, and the leaks and oil consumption stop.
- Excessive blow-by is an engine problem — worn rings, a bad turbo seal, or a leaking injector washer — and no CCV part in the catalog will fix it.
So diagnose first. For a permanent, service-free fix to the factory separator, both TruckTok CCV kits — the value ER-0091 and the premium ER-0179 — are built for the full 2011–2023 6.7L run and ship free. TruckTok.com carries the complete Powerstroke line — from CCV and EGR delete kits to filter sets and disaster-prevention hardware — engineered for the Powerstroke, Cummins, and Duramax platforms.
Frequently Asked Questions
Q1: How do I know if my CCV filter is clogged or my engine has a blow-by problem?
A: Measure crankcase pressure or watch the oil cap. If a new separator clears the symptoms and they stay gone, it was the filter. If they return quickly, it’s excessive blow-by — rings, turbo seal, or injector washer — and no CCV fix will cure it.
Q2: What’s a normal crankcase pressure on a 6.7L Powerstroke?
A: At hot idle, a healthy engine sits near 1–2 inches of water. Under a full-throttle pull, a good setup stays in the single digits to low teens. Around 2 PSI (~56 inches of water) is the practical ceiling; beyond that you have a restriction or a blow-by problem.
Q3: Is the 2011–2016 CCV really that bad?
A: Yes — the first-gen centrifugal separator measured around 40 inches of water at wide-open throttle, enough to launch the oil cap. It’s the reason Ford redesigned it. If you own one and haven’t touched the CCV, it’s your most likely source of hidden oil leaks.
Q4: Will deleting the CCV trigger a check engine light?
A: Generally no. The 6.7L CCV loop is mechanical with no flow sensor, so removing it doesn’t throw a code on its own. The exception is 2011–2014 trucks, which had an electrical connector on the vent hose that can set P04DB once disconnected.
Q5: Does a CCV reroute improve horsepower or fuel economy?
A: No. It’s a reliability and intake-cleanliness upgrade, not a power mod. You get a cleaner turbo inlet and fewer pressure-driven oil leaks, but no gain at the crank and no change in fuel consumption.
Q6: What’s the difference between the two TruckTok kits?
A: The ER-0091 ($71.99) is the value Venturi-style block with silicone hose; the ER-0179 ($154.83) is the billet build with an active Venturi throat and the option to pair with a catch can. Both are permanent, service-free vent-to-atmosphere designs.
Q7: Can a catch can fix excessive blow-by?
A: No. A catch can traps oil mist, but if the engine is producing too much blow-by, the can just fills faster. A quickly-filling can is a diagnostic signal pointing at rings or a turbo seal — not something a bigger can solves.
Q8: Is venting the CCV to atmosphere legal?
A: Not on a street-driven, registered truck. It removes part of the certified emissions control and can violate the Clean Air Act, void warranty, and fail inspection. OEM filter replacement is legal everywhere; a full delete is off-road or competition use.
Q9: How often should the stock CCV filter be replaced?
A: Roughly every 100,000 miles for normal use, sooner if you idle a lot, tow hard, or run in dust. Heavy-duty and cab-chassis trucks that idle for long periods are the highest-risk group, per Ford’s own TSB.
Q10: Can a badly routed reroute make crankcase pressure worse?
A: Yes. Long hoses, multiple fittings, small-ID AN adapters, and redundant catch cans all add restriction, and a test showed an over-plumbed reroute raising pressure above the stock box it replaced. Keep the vent path short, straight, and uncrimped.